Cithrel’s Fall Dungeon Guide in Fellowship
While Cithrel’s Fall in Fellowship might have fewer annoying enemies to be aware of, it is nonetheless a very challenging dungeon. It will test players’ ability to work together, stay out of environmental hazards, and deal with constant enemy adds in some instances.
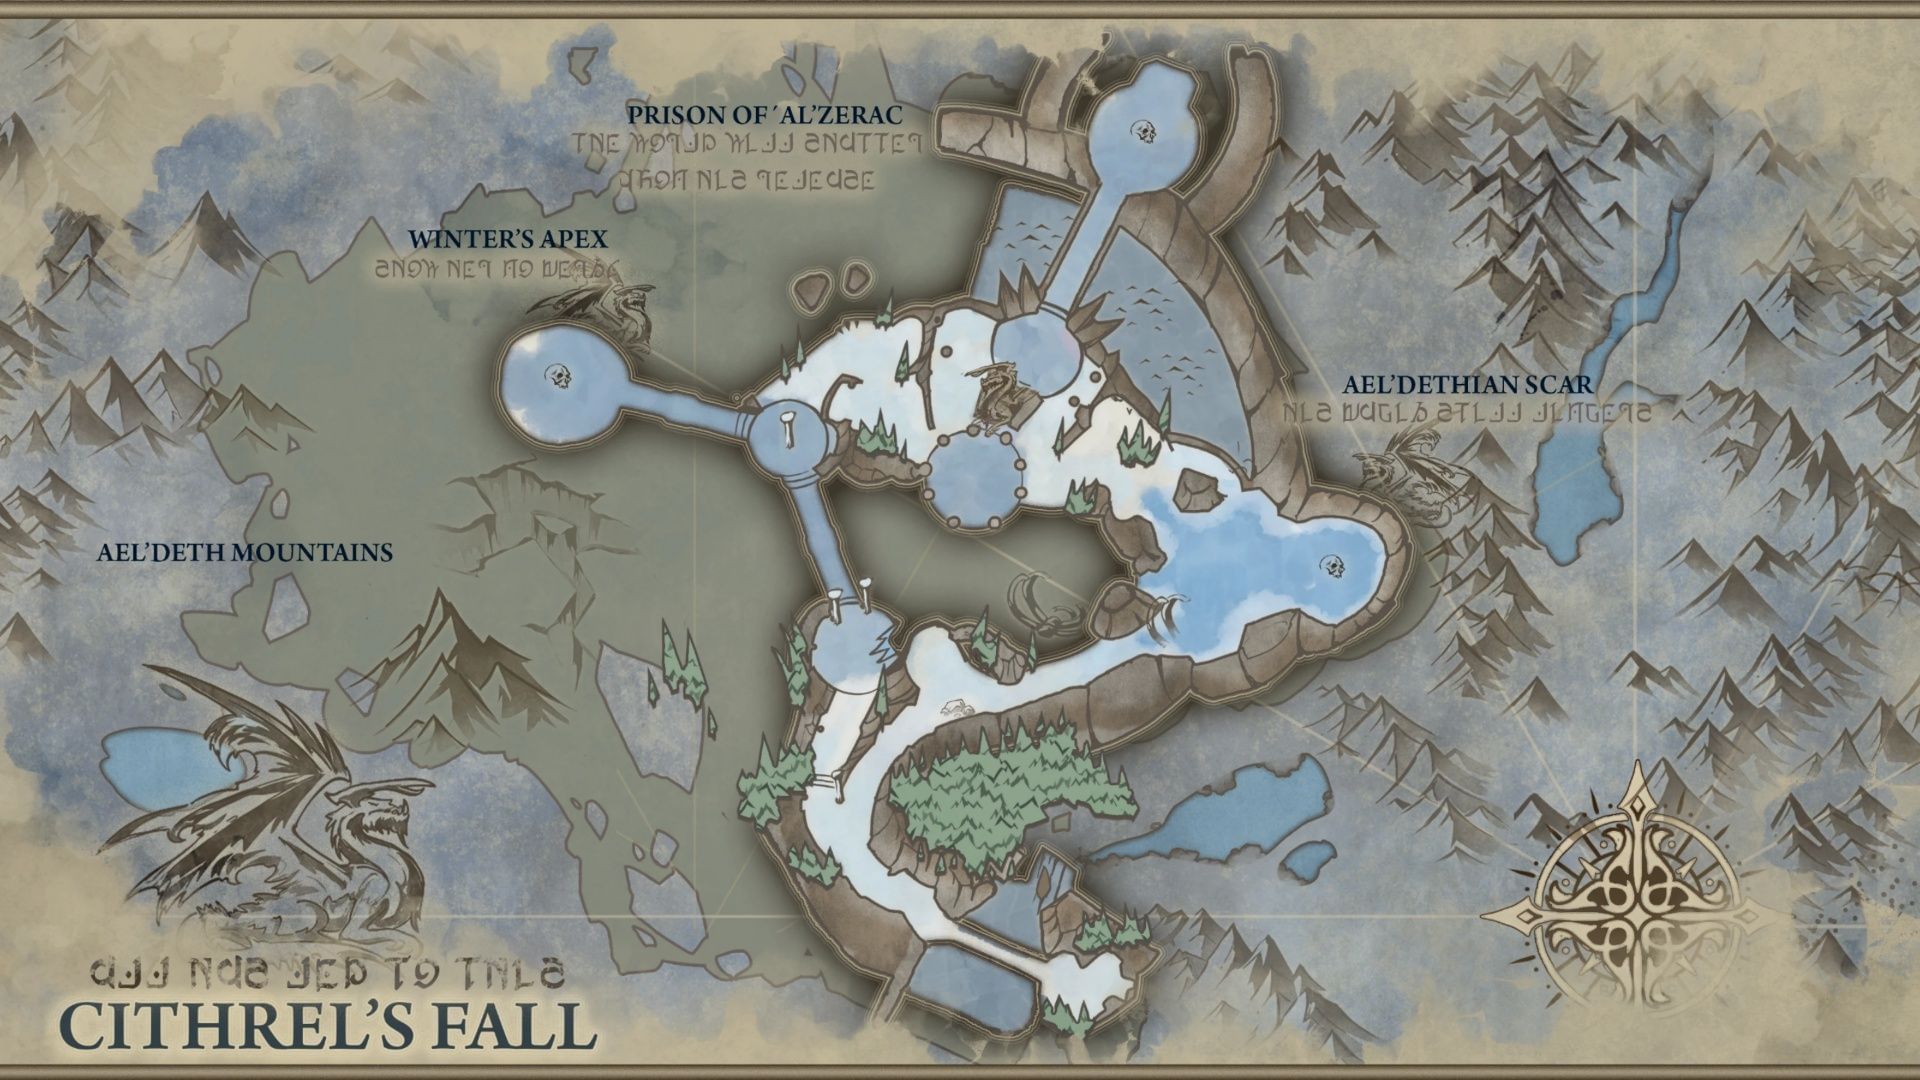
As one of the dungeons, it’s a timed three-boss affair, unlike Adventures, which only require one boss fight to complete. An icy prison, Cithrel’s Fall is one of the cooler dungeons in Fellowship, currently available in Early Access. However, it will take some time to reach and to be truly ready for it. This dungeon will test your reaction time, especially your ability to interrupt deadly attacks to keep your team safe.
What to Know About Cithrel’s Fall Dungeon
- Kill Score Requirement: 188
- Timer: 28 minutes
- Bosses: Noor, the Betrayer; Ancient Koros; Cithrel
- Dungeon Mechanics: Lots of movement and constant waves of enemies
Similar to The Heart of Tuzari, Cithrel’s Fall is a challenging three-boss dungeon under a 28-minute timer. However, unlike Heart of Tuzari, you don’t have to worry about annoying demon walls to route. It’s a fairly open dungeon. If you have experience with harder WoW dungeons, this one will still be difficult, but manageable.
Noor, the Betrayer’s Trash Mobs and Mechanics
Noor, the Betrayer consistently summons additional trash mobs, specifically Eldrin Recruits and Eldrin Sentinels, making the fight feel hectic. Big AOEs appear frequently but are generally easy to avoid if you watch the ground carefully. The main threat is getting caught in Razor Traps, which root you in place.
Trash Mobs
- Tundra Stalker: Channels Rapid Fire aimed at the tank. Can be crowd controlled (CCed).
- Eldrin Sentinel: Uses Shattering Barrier to shield itself or allies. Interrupt or focus down quickly because the shield also deals damage.
- Deceitful Scholar: Casts Rune of Detonation (an AoE that can be CCed) and Arcane Strike, which targets the tank. CC if possible.
- Volatile Orb: Targets the farthest player, moving towards them and dealing damage. Kite it away from the group.
- Blade of Cithrel: Uses Slicing Blades, which channels and follows the tank, can be CCed. Its Ice Breaker leap targets players — if targeted, move away from the party to avoid damage.
Boss Mechanics
- Betrayer’s Arrow: Targets a player with a damaging arrow, dealing splash damage around the target.
- Arcane Volley: Applies a debuff that deals damage every second for 6 seconds to the whole party. Mass Dispel can remove this if timed well.
- Cold-Blooded Twist: Noor jumps to the arena’s center, creating icy and safe zones. Stand in safe cones to avoid damage.
- Actuate Ambush: Summons two Eldrin Recruits and an Eldrin Sentinel.
- Razor Trap: Spawns under a random player, dealing damage and rooting after a delay. Move quickly to avoid being rooted.
Tips: Positioning and movement are critical in this fight. Avoid getting caught in Razor Traps and be mindful of splash damage from Betrayer’s Arrow. Tanks should prioritize picking up adds and interrupting Eldrin Sentinels’ Shattering Barrier.
Ancient Koros’ Trash Mobs and Mechanics
Located in an icy prison, this section introduces familiar enemies alongside new elemental foes. The fight doesn’t involve adds, but solid planning is essential.
Trash Mobs
- Corrupter: Heals itself for 35% of the damage it deals. Interrupt its Freezing Blood ability, which when it expires, causes massive damage. Also has a tank-targeted Ice Bolt to interrupt.
- Ice Shardling: Explodes on death, triggering a stacking 10% slow and DOT for 5 seconds — avoid standing near dying Shardlings.
- Spellbound Golem: Cannot be CCed. Leaves Ice Spikes under players forcing them to move. On death, it spawns 3 Ice Shardlings.
Boss Mechanics
- Volatile Orb: Follows the farthest player and deals heavy damage on impact. It can be destroyed with Shatterstrike.
- Shatterstrike: Targets a random player with a frontal cone attack that also destroys Volatile Orbs.
- Converging Cold: Applies a Magic DOT and slow on players caught in Shatterstrike; if not dispelled, it freezes the player.
- Calamitous Fracture: Creates a rift that must be soaked by a player. Triggers Unstable Energy debuff, increasing damage taken from the next soak.
- Calamity Rift: Spawns an AoE pool after a delay that damages players.
Tips: Assign a mobile player to kite and manage Volatile Orbs so they get hit by Shatterstrike. Ensure healers dispel Converging Cold quickly. Rotate soaking Calamitous Fracture to avoid stacking debuffs and drop Calamity Rifts away from the group.
Cithrel’s Mechanics and Strategies
Thankfully, no new trash mobs appear before Cithrel, allowing you to focus entirely on the boss fight. The encounter is a race against time due to an enrage at 50% health called Draconic Frenzy, which speeds up her abilities.
Boss Abilities
- Path to Oblivion: Targets a player with a large explosion. The team must gather to soak the first blast, then immediately run away to avoid the second.
- Bloodhunter’s Mark: Marks two players who must separate from each other and the party. This ability deals AoE damage and applies a bleed.
- Draconic Frenzy: Enrage phase at 50% health, making Cithrel use attacks more frequently.
- Breath of Al’zerac: A cone-shaped tank buster. The tank should face it away from the group and use defensive cooldowns.
- Maelstrom: Pulls all players toward Cithrel, often overlapping with Bloodhunter’s Mark, increasing fight complexity.
Tips: If you’re familiar with Final Fantasy XIV, Path to Oblivion works similarly; soak together, then quickly disperse. Hold cooldowns for the enrage period when multiple abilities overlap. Marked players must maintain distance from each other and the group during Bloodhunter’s Mark, especially since Maelstrom can pull everyone close quickly.
As the fight progresses, the arena shrinks, so be mindful of positioning to avoid getting cornered. Quick reactions and teamwork are key to emerging victorious.
Potential Loot Drops from Cithrel’s Fall
Cithrel’s Fall reportedly features a massive loot pool with various gear drops that vary by tier. These include plenty of actual gear pieces, not just relics and rings. For a comprehensive list of items, check out our Google Sheets link (link would be inserted here).
Explore More Fellowship Guides and Features
- Fellowship: Ardeos Build Guide
- Fellowship: Tariq Build and Hero Guide
- Every Mount in Fellowship and How to Unlock Them
- Fellowship: Sylvie Build and Hero Guide
https://www.sportskeeda.com/mmo/fellowship-cithrels-fall-dungeon-guide